Add Upload Setting
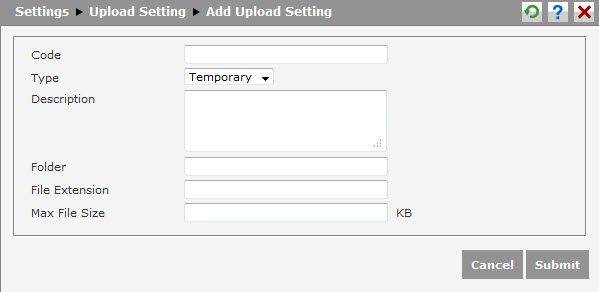
To add upload setting data, click  icon then the Add page will appear as shown below.
Follow these steps to to complete the data.
- Code
Type the code of upload setting made by users. The code name is usually equated with menu function that has upload function, such as Announcement.
- Type
Choose the storage type of file uploaded by users. There are four provided types which are:- Temporary
It is temporary type of upload. This type enables users to change the data that have been edited. This type is usually deleted immediately by the system if it is not used anymore.
- Repository
It is permanent type of upload related to framework system.
- Client
It is the type of upload based on respective company requirements. For example, for upload code of Company Logo, it should use upload type of Client because the logo of each company is different.
- Other
It is the type of upload which is not included of category of Temporary, Repository, and Client.
- Temporary
- File
It is the folder location to relocate file uploaded by users. Type the folder name according to the folder location in the system.
- File Format
Determine the format of file uploaded by users. For example, for upload code of Employee Photo, then the file format can be jpg, jpeg, png, gif, etc.
- Maximum File Size
It is the limit of maximum size of file uploaded by users. Type the numbers to determine maximum size of the uploaded file in KiloByte.
After finished completing the data, click  to save the data. Click
  to cancel creating new data.